
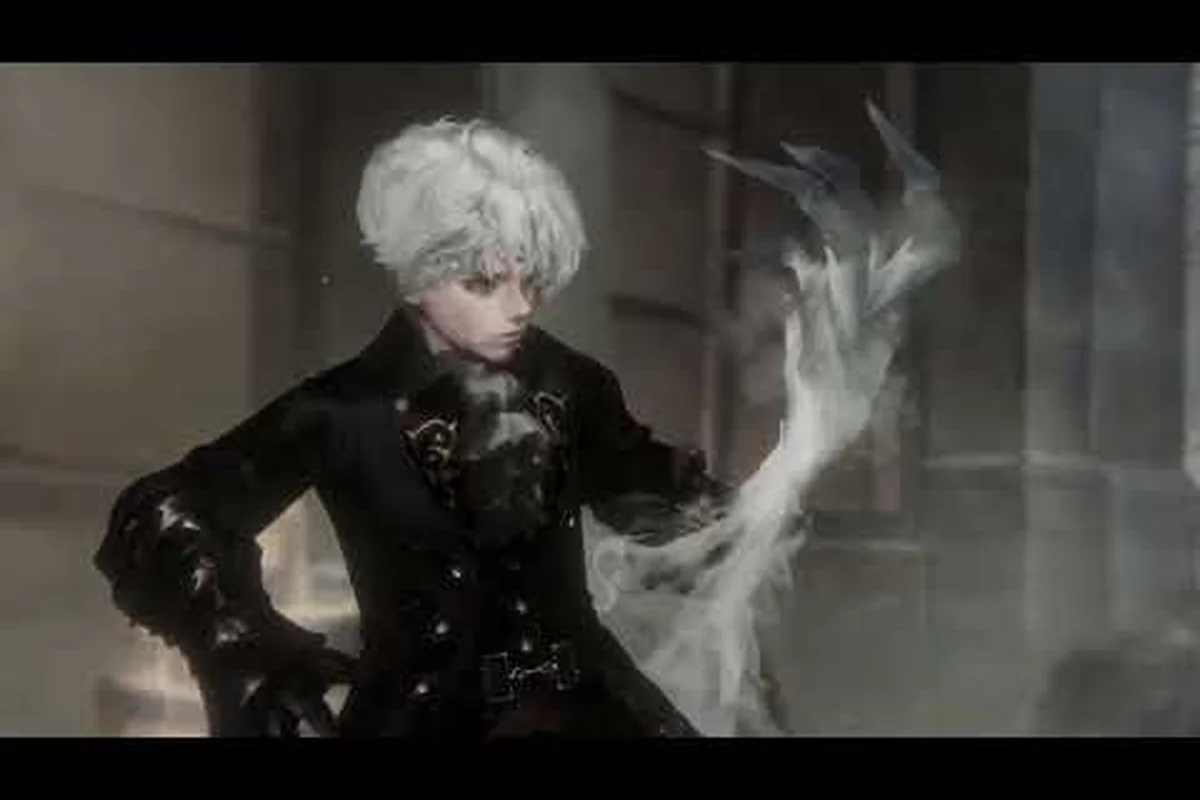
The vapor world over the mind ep2 area is where the dream starts to feel genuinely hostile, and knowing where to explore first can save you from a frustrating spiral of deaths. This section introduces the first major shift in level design philosophy: hand-painted dream layers that loop back on themselves, forcing you to memorize sightlines and deflection timings rather than simply pushing forward. Because the game draws combat inspiration from Sekiro and Bloodborne, the EP2 area demands a different approach to navigation than the opening corridors, which is why understanding the layout before you commit to a path matters so much.
The EP2 area sits at a critical junction in the dream world map, acting as both a vertical climb and a lateral sprawl. Players who rush through it without mapping the interlocking areas often miss the shortcut that makes repeat visits painless. Get the latest route breakdown below, including which branches to clear first, which Projections guard the most valuable Embers, and how the dream level design telegraphs hidden passages through environmental storytelling rather than glowing markers.
Vapor World Over The Mind EP2 Area Layout Overview
Ember Extraction Routes for EP2 Projection Cores
Prioritize the two Projections guarding the hand-painted bridge on the eastern edge of the EP2 Area, as they drop Ember cores that permanently increase your Id meter capacity by 15 points each. The stealth section before the first boss allows you to backstab one Projection without triggering a Crack Break, saving your deflection meter for the second. After extraction, a shortcut ladder unlocks behind the bridge, letting you bypass the lower swamp on subsequent runs. This route cuts traversal time from 4 minutes to under 90 seconds, making it ideal for farming Embers before the boss encounter.
The vapor world over the mind ep2 area abandons the linear tutorial flow in favor of a semi-open structure where three distinct sub-zones branch off from a central hub chamber. According to the official Vapor World: Over The Mind website, the game is a narrative-driven 2D souls-like platformer where Projections are dream entities that stand in your way, and breaking them lets you extract their cores. That core loop drives everything you do in EP2, because the area is designed around gating progression behind specific Ember counts rather than simple key items.
The central hub features a shattered clock tower that serves as a visual landmark, and every path you take eventually loops back to this point. This is the first real test of the game's seamless world design, since the EP2 area connects to both the EP1 remnants and the deeper nightmare layers that follow. The dream level design here uses color temperature to guide you: warm amber tones mark safe-ish routes with fewer Projections, while cold blue-gray passages hide tougher encounters and richer rewards.
| Sub-Zone | Primary Threat | Key Reward | Recommended Order |
|---|---|---|---|
| Clockwork Terrace | Ranged Projections | Ember Shard x3 | First |
| Mirror Galleries | Stealth ambushes | Memory Fragment | Second |
| The Sunken Ward | Heavy melee brutes | Shortcut unlock | Third |
The Clockwork Terrace is the intended starting point because it teaches you the deflection rhythm against ranged enemies, which the rest of the area punishes you for ignoring. The Mirror Galleries demand patience, since Projections hide behind reflective surfaces and only reveal themselves when you pass specific trigger points. The Sunken Ward holds the area's most important secret: a shortcut that connects back to the hub, cutting traversal time by nearly half for future farming runs.
Dream Level Design and Interlocking Areas Explained
The vapor world over the mind dream level design in EP2 represents a major evolution from the first area, because it introduces verticality as a core navigation tool rather than a cosmetic flourish. You will climb collapsed staircases, drop through broken ceilings, and ride rising platforms that emerge from the dream's shifting architecture. Each of these vertical routes connects to the interlocking areas horizontally, which means the map rewards players who think in three dimensions instead of just moving right.
The interlocking areas in EP2 are not merely connected corridors; they share physical space in ways that create meaningful shortcuts. For example, the Clockwork Terrace's upper balcony overlooks the Mirror Galleries' central hall, and a well-timed jump from the balcony lets you bypass an entire gauntlet of ranged Projections. Community reports suggest this shortcut was discovered accidentally by players who were fleeing an ambush, which highlights how the level design encourages desperate improvisation.
Reading the Environment for Hidden Paths
The dream level design communicates hidden routes through subtle visual cues that you can learn to read after a few hours of play. Cracked walls with faint blue light seeping through indicate destructible barriers, while tilted paintings in the Mirror Galleries always hide a small alcove behind them. The Crack Break mechanic, which the gameplay trailer highlights as the key to leaving Projections defenseless, also applies to certain environmental objects, letting you shatter specific walls by deflecting their attacks back at them.
The Hub-and-Spoke Map Structure
The EP2 area uses a hub-and-spoke structure that keeps you oriented even when the dream becomes disorienting. Every spoke route eventually returns to the shattered clock tower, and each return trip unlocks a new dialogue line from the boy Paslow that hints at the next objective. This design choice means you rarely feel lost, because the game constantly pulls you back to a recognizable anchor point, which is a deliberate contrast to the maze-like layouts found in later chapters.
Where to Explore First in the EP2 Area
Knowing where to explore first in the vapor world over the mind ep2 area comes down to understanding what each path offers in terms of combat preparation and narrative context. The Clockwork Terrace should always be your first stop because it provides the Ember Shards needed to upgrade your deflection stamina, which directly impacts your survivability in the other two sub-zones. Skipping this route means entering the Mirror Galleries with base stats, and the stealth ambushes there will punish that decision harshly.
Your exploration order should follow a clear logic that balances risk against reward, and the table below breaks down what you gain from each path:
| Exploration Order | Time Investment | Combat Difficulty | Essential Loot |
|---|---|---|---|
| Clockwork Terrace first | 15-20 minutes | Low | Ember Shards, basic upgrade materials |
| Mirror Galleries second | 25-30 minutes | Medium | Memory Fragment, stealth-focused Id upgrades |
| Sunken Ward third | 20-25 minutes | High | Shortcut unlock, heavy armor set |
The Memory Fragment in the Mirror Galleries is particularly valuable because it expands the narrative context for why the dream world exists, and it also unlocks a new dialogue tree with Paslow that provides hints about the boss encounter at the end of the area. Players who skip this fragment miss out on crucial lore that makes the final confrontation feel earned rather than arbitrary.
How to Reach New Worlds from the EP2 Area
Understanding how to reach new worlds from the vapor world over the mind ep2 area requires recognizing that the game gates progression behind both Ember extraction and narrative triggers. After you clear the Sunken Ward and activate the shortcut, a new path opens in the hub chamber that was previously blocked by a massive dream seal. Interacting with this seal triggers a cutscene where Paslow remembers a fragment of his waking life, which causes the dream architecture to shift and reveal the passage to the next world.
The transition to new worlds follows a consistent pattern that you can anticipate once you recognize it: each area ends with a Dream Anchor that you must activate, and activating it draws the next world's entrance into existence. The EP2 area's anchor sits at the top of the Sunken Ward, guarded by a mini-boss Projection that tests everything you have learned about deflection and positioning. Defeating this guardian and activating the anchor is the only way to progress, which means you cannot simply grind your way past the area without engaging with its combat systems.
For a complete breakdown of the seamless world structure and how every area connects, check the Vapor World: Over The Mind map guide which covers the full size and layout of the dream world. The EP2 area is just one piece of a much larger puzzle, and understanding the overall map helps you plan your exploration more efficiently.
Practical Exploration Tips for the EP2 Area
Crack Break Deflection Timing in the EP2 Area
The EP2 Area's Projections telegraph attacks with a distinct wind-up flash, and deflecting that exact frame triggers a Crack Break, leaving the enemy defenseless for roughly 3 seconds. Unlike the EP1 starting zone, EP2 Projections mix delayed strikes with fast jabs, so hold deflection until the flash, not the animation start. Successfully landing a Crack Break lets you extract Embers with the power of the Id, restoring health and building your deflection meter. Missing the timing leaves you staggered, vulnerable to the follow-up combo that deals 40% of your base HP.
The vapor world over the mind ep2 area rewards methodical exploration, but it also punishes excessive caution because some Projections respawn if you leave their aggro range and return. You need to balance thoroughness with momentum, clearing each sub-zone completely before moving to the next one. The deflection timing for the heavy brutes in the Sunken Ward is notably stricter than anything you faced in EP1, and community testing suggests the parry window is roughly 30% shorter than the tutorial enemies.
Here are the practical tips that experienced players report making the biggest difference in the EP2 area:
-
Upgrade deflection stamina first — the Ember Shards from the Clockwork Terrace should go into stamina upgrades before anything else, because every sub-zone punishes exhausted players.
-
Use the environment against ranged Projections — the clock gears in the Terrace can be deflected back at enemies, dealing double damage and staggering them.
-
Memorize the Mirror Galleries patrol routes — the stealth ambushes follow fixed patterns, and observing them from a safe distance for one cycle reveals the exact timing you need to slip through.
-
Save the Sunken Ward for last — the shortcut unlock is the most valuable reward in the area, and having it active makes farming runs for upgrade materials significantly faster.
-
Listen for the dream whispers — the game's audio design cues you to hidden rooms with a faint choral sound, and players who play with headphones report finding 30% more secrets than those who do not.
The interlocking areas in EP2 also hide several optional alcoves that contain lore fragments and cosmetic items, and these are easy to miss if you rush through the main paths. The dream level design rewards players who double back after unlocking new abilities, because some passages require the Crack Break environmental destruction that you only learn about midway through the area. If you want to find every secret, plan on revisiting each sub-zone at least twice before moving to the next world.
For a detailed walkthrough of where to find every Memory Fragment and hidden secret in the dream locations, the area memories guide breaks down each collectible's exact position. The EP2 area contains three Memory Fragments total, and two of them are tucked away in optional alcoves that the main path never directs you toward.
Comparing EP2 Area to Other Dream Worlds
The vapor world over the mind ep2 area sets the template for how subsequent worlds handle level design, but it also has distinct characteristics that make it stand out from the rest of the dream. Later areas lean more heavily into environmental hazards and puzzle mechanics, while EP2 focuses almost exclusively on combat encounters and traversal challenges. This makes it the purest test of your deflection skills, which is why many players consider it the best training ground for the game's harder content.
| Area Feature | EP2 Area | Later Worlds |
|---|---|---|
| Primary challenge | Combat encounters | Environmental puzzles |
| Navigation style | Hub-and-spoke | Linear with branches |
| Secret density | Moderate | High |
| Boss encounter | Mini-boss guardian | Full boss fights |
The hub-and-spoke structure in EP2 is actually unique among the game's areas, because later worlds adopt a more linear approach with occasional branches rather than a central anchor point. This design choice makes EP2 the most replayable area for farming purposes, since you can quickly loop through all three sub-zones without lengthy backtracking. The shortcut you unlock in the Sunken Ward reinforces this, cutting the full loop down to roughly five minutes once you know the route.
Players who want to understand how the EP2 area fits into the broader world structure should consult the all worlds and dream layers guide, which ranks each area by difficulty and explains the narrative connections between them. The EP2 area serves as the bridge between the tutorial's gentle introduction and the brutal difficulty spike of the third world, and understanding that positioning helps you pace your upgrade spending appropriately.
Frequently Asked Questions
What is the vapor world over the mind ep2 area?
The vapor world over the mind ep2 area is the second major region in the game, featuring three interconnected sub-zones built around a central hub. It introduces vertical traversal, stealth ambushes, and a mini-boss guardian that tests your deflection combat skills before allowing progression to the next world.
How long does it take to complete the EP2 area?
Most players report completing the vapor world over the mind ep2 area in roughly 60 to 90 minutes on a first playthrough, assuming they explore all three sub-zones thoroughly. Speedrunners can finish it in under 30 minutes by skipping optional content, but they miss the Memory Fragments and shortcut that make later farming efficient.
Where is the shortcut in the EP2 area?
The shortcut is located in the Sunken Ward, the third sub-zone you should explore. After defeating the heavy melee brutes near the area's end, you will find a lever that activates a collapsing bridge, creating a direct path back to the central hub chamber. This cuts traversal time significantly for future visits.
What is the best upgrade priority for the EP2 area?
Deflection stamina should be your first upgrade priority, since every sub-zone punishes exhausted players with unavoidable damage. After that, focus on Ember extraction speed, which reduces the time you spend vulnerable after breaking a Projection's guard. Health upgrades are less valuable here because most encounters are avoidable with proper positioning.
How do I unlock the path to the next world after EP2?
After activating the Dream Anchor atop the Sunken Ward, return to the central hub and interact with the massive dream seal blocking the clock tower's base. This triggers a cutscene revealing a glowing rift—your passage to the next world. Ensure you've extracted all Projection cores first, as the rift seals permanently once you cross.