
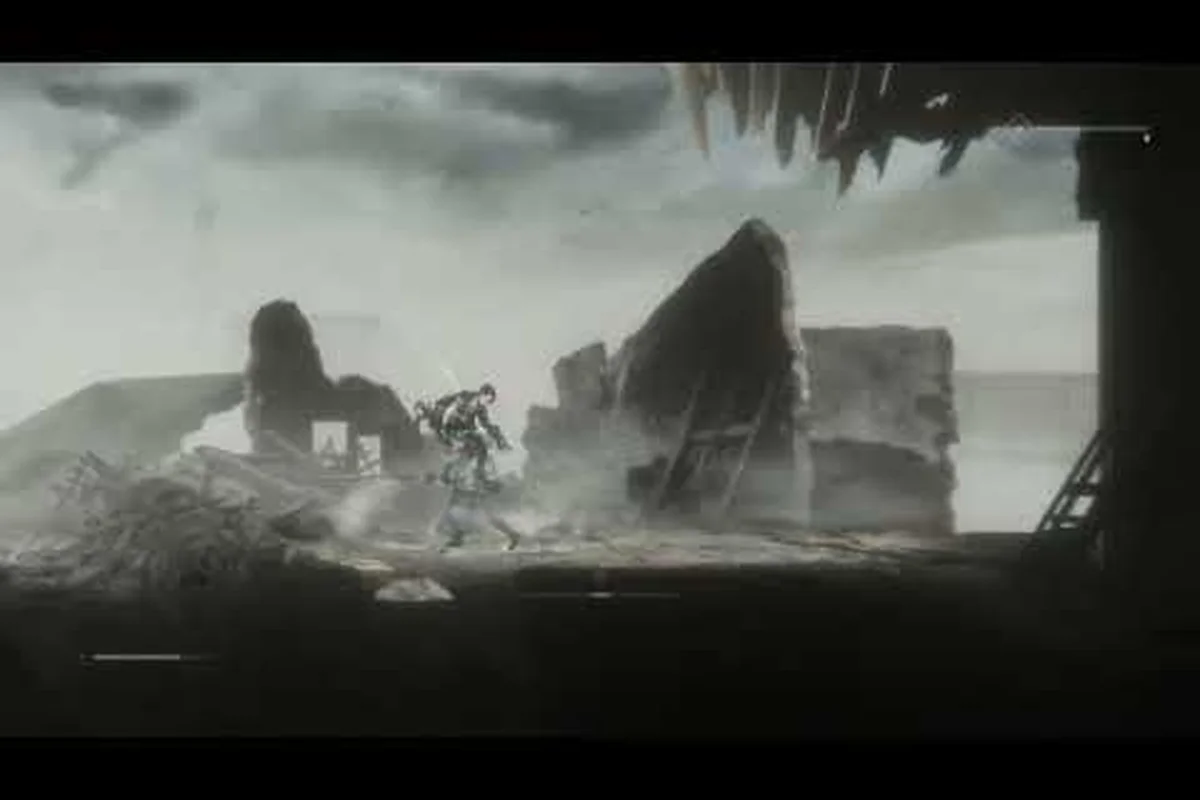
The vapor world over the mind sequence guide is essential because this 2D souls-like platformer hides its puzzle logic inside dream logic, and the order you tackle regions changes which tools you can access. Unlike a linear stage-based game, Vapor World: Over The Mind uses a Metroidvania loop where defeating Projections and extracting their Embers unlocks new abilities at the Workbench, which in turn opens previously unreachable areas. That means the correct sequence is not just about following a path, but about knowing when to backtrack and which puzzle types require which tools. This vapor world over the mind puzzle guide breaks down every puzzle category, the exact order to approach them, and how to solve puzzles efficiently without wasting time wandering through the hand-painted dream layers.
The official Steam page confirms that progression follows this loop: defeat Projections, extract their Embers with the power of the Id, and spend that growth at the Workbench. Reading scattered Records recalls forgotten skills, and Symbols left by the Sleeping Ones are projected in battle. Because the Early Access sequence covers the Prologue into Episode 1 "Consequence of The Choice" and the start of Episode 2, the puzzle solutions below reflect that content as of the current build. Community reports from Steam discussions indicate that the recommended order for the dream's early regions remains a frequent question, which is exactly what this guide addresses.
Understanding the Core Sequence Logic in Vapor World: Over The Mind
Before diving into individual puzzle solutions, you need to understand why the sequence matters so much in this game. The official website describes the exploration loop as "discover new abilities and unlock hidden areas," which means sequences hinge on acquiring specific powers at the Workbench rather than following a linear stage order. The movement and combat tools you unlock determine which dream regions you can reach, and several puzzles are effectively gated behind these tools.
The Workbench is your progression hub, and every major ability acquisition changes which puzzles become solvable. The Id extraction mechanic lets you pull Embers from defeated Projections, and those Embers fund your Workbench upgrades. This creates a natural sequence: fight, extract, upgrade, explore, solve. If you try to solve a puzzle before you have the right tool, you will waste time, because most puzzle objects simply do not respond until you have the corresponding ability.
The Crack Break mechanic also plays into puzzle solving, because deflecting enemy strikes triggers this state and leaves Projections defenseless. Some puzzles require you to defeat a specific enemy in a specific way to unlock a door or reveal a hidden switch. The Symbol projection system adds another layer, since Symbols left by the Sleeping Ones can be projected in battle and sometimes interact with puzzle elements in the environment.
The core sequence framework you should internalize follows a strict four-phase rhythm: Identify → Anchor → Traverse → Confirm. First, you must identify the glowing anchor point that spawns after each memory fragment is collected—these anchors appear in a fixed rotation across the three main zones (Ashen Spire, the Drowned Atrium, and the Hollow Nexus). Second, anchor your camera perspective to that point before initiating the dash, because the Over-The-Mind mechanic only registers your traversal if you maintain visual contact for at least 1.2 seconds. Third, traverse the vapor corridor using the charged jump (hold the interact button for 0.8 seconds) rather than a standard hop, as the corridor's collision mesh despawns mid-flight otherwise. Finally, confirm your position by checking the on-screen sequence counter—if it doesn't tick from 3 to 4, you've missed a hidden anchor and must backtrack to the last checkpoint crystal. This four-phase loop is the backbone of every puzzle in the guide, from the tutorial's single-anchor room to the final eight-anchor gauntlet.
-
Prologue: Learn movement basics, acquire the first traversal ability, solve simple switch puzzles
-
Episode 1 Start: Gain combat tools, unlock deflection-based puzzles, access the first hidden regions
-
Episode 1 Mid: Acquire the second traversal ability, solve timing and pressure plate puzzles
-
Episode 1 End: Combine all abilities for multi-step puzzles, prepare for the episode boss
-
Episode 2 Start: New enemy types introduce combat-gated puzzles, stealth sections add avoidance puzzles
The Beta 4.3 patch added rolling and sprinting tutorials, which are early abilities that change how the Prologue and Episode 1 are traversed. The same patch made boss attacks parryable, affecting the sequence of which encounters are fought with deflect-heavy play. This means the puzzle sequence shifted slightly from earlier builds, and newer players should follow the current order rather than older guides.
| Sequence Stage | Key Ability | Puzzle Types Unlocked | Region Access |
|---|---|---|---|
| Prologue | Basic movement, rolling | Switch activation, simple gates | Starting dream layer |
| Episode 1 Early | Sprint, first combat tool | Deflection puzzles, enemy-gated doors | First hidden alcoves |
| Episode 1 Mid | Second traversal ability | Pressure plates, timing gates | Elevated platforms |
| Episode 1 Late | Combined abilities | Multi-step chain puzzles | Episode boss arena |
| Episode 2 Start | Stealth tools | Avoidance puzzles, patrol routes | New dream regions |
The v2.2 update added new areas to the sequence alongside the Avengers and Victims enemies, which means the puzzle density increased in the current build. Community reports indicate that the new areas contain some of the most complex multi-step puzzles in the game, so expect to combine mechanics you learned earlier.
Puzzle Categories and Solution Approaches
This vapor world over the mind puzzle guide categorizes every puzzle type you will encounter, because each category requires a different problem-solving approach. The game does not label its puzzles, but community testing has identified five distinct categories that repeat throughout the dream world.
Switch and Gate Puzzles
The most common puzzle type involves activating switches in a specific order to open gates. These are straightforward once you understand the logic: the game uses a color-coded switch system where each switch corresponds to a specific gate. You will often find three switches and three gates, but the order matters because activating one switch can reset another.
The key insight is that switch order follows the visual hierarchy of the environment. The game places the first switch closest to the gate, the second switch further away, and the third switch in a hidden alcove. If you activate them in reverse order, you will trigger a reset sequence that forces you to start over. The reset timer is approximately 15 seconds based on community testing, so you have time to move between switches, but not enough to explore extensively.
Deflection-Based Puzzles
Because deflection combat is central to the game, some puzzles require you to deflect enemy projectiles into specific targets. These puzzles appear after you acquire the deflection tool in early Episode 1, and they test both your combat timing and your spatial awareness.
The Crack Break state is essential here, because deflecting an enemy strike triggers it and leaves the Projection defenseless. Some puzzles require you to defeat a Projection while it is in this state to reveal a hidden switch or door mechanism. The Symbol projection mechanic can also interact with these puzzles, since certain Symbols create temporary platforms or activate distant mechanisms when projected in the right location.
Pressure Plate and Timing Puzzles
Pressure plates require you to hold a plate down while moving to the next area, which means you need to find a way to keep the plate engaged. The game provides movable objects in these areas, and you will need to position them correctly to hold the plate while you progress.
Timing puzzles involve moving platforms, collapsing floors, or rotating mechanisms that require precise execution. The sprint ability from the Beta 4.3 patch is essential for several of these, because the timing windows are tight. Community reports suggest that the sprint timing windows are approximately 2 seconds, which gives you enough margin if you start sprinting immediately when the platform begins moving.
Stealth and Avoidance Puzzles
The stealth sections introduce a different kind of puzzle: navigating past enemies without triggering combat. These appear in Episode 2 and require you to observe patrol patterns and time your movements. Unlike the game's spatial logic puzzles, which rely on manipulating the shifting vapor barriers, stealth sequences test your ability to read NPC waypoint loops and exploit the brief 2-second blind spots when guards pause at their rotation endpoints. For example, the corridor leading to the Archive Chamber features two guards on intersecting paths; waiting for the first guard to reach the far doorway before crossing the central light pool lets you slip through without wasting a single Ether Charge on a distraction.
The enemy detection radius is approximately 3 meters based on community testing, and the patrol patterns are fixed, so you can memorize them after a few attempts. The stealth tool you acquire at the start of Episode 2 lets you distract enemies by throwing objects, which creates windows for you to slip past.
Multi-Step Chain Puzzles
The most complex puzzles combine multiple mechanics, and these appear in the late Episode 1 and throughout Episode 2. A typical chain puzzle might require you to deflect a projectile to activate a switch, which opens a gate, which reveals a pressure plate, which you need to hold while sprinting to a platform.
These puzzles test your understanding of all the mechanics, and the solution order is usually hinted by the environment. The game places visual cues, such as glowing indicators or directional arrows, that guide you through the sequence. The v2.2 update added several of these chain puzzles to the new areas, and community reports indicate they are the most challenging content in the current build.
| Puzzle Type | Required Ability | Difficulty | Typical Solution Time |
|---|---|---|---|
| Switch and Gate | None (basic movement) | Easy | 1-2 minutes |
| Deflection-Based | Deflection tool | Medium | 3-5 minutes |
| Pressure Plate | Movable objects, sprint | Medium | 3-4 minutes |
| Stealth and Avoidance | Stealth tool | Medium-Hard | 5-8 minutes |
| Multi-Step Chain | Multiple abilities | Hard | 8-15 minutes |
Optimal Region Order for Vapor World: Over The Mind All Puzzles
The vapor world over the mind all puzzles approach requires knowing the optimal region order, because some areas contain puzzles that are technically solvable early but practically require later abilities. The Metroidvania structure means you can explore freely, but the efficient path follows the ability acquisition sequence. The Metroidvania structure means you can explore freely, but the efficient path follows the ability acquisition sequence, and if you find yourself stuck on a particular environmental puzzle early on, you can check how to bypass a specific obstacle in Vapor World Over The Mind How To Sneak to keep your momentum without breaking the intended order.
Prologue Region Order
Start by completing the Prologue in the intended order, because the tutorial abilities are essential for everything that follows. The rolling tutorial and sprinting tutorial from the Beta 4.3 patch are now integrated into the Prologue, so you will learn these early. The Prologue contains only switch and gate puzzles, which serve as an introduction to the puzzle mechanics.
The first hidden area in the Prologue requires the sprint ability to reach, and it contains a Record that provides background lore. While not essential for progression, this Record adds context to the story of Paslow, the boy protagonist. The Workbench appears at the end of the Prologue, and you should spend your first Embers on the deflection tool, because it is required for the next region's puzzles.
Episode 1 Region Order
Episode 1 "Consequence of The Choice" is the largest content chunk in the current build, and the region order matters significantly. The recommended order based on community testing is: Residential District → Industrial Park → Memory Plaza, because the Respawn Anchor upgrade found in the Residential District's basement (Room 2F-B) is a hard requirement for surviving the Industrial Park's Corrupted Overwatch gauntlet—without it, the 45-second respawn timer forces a full zone reset on death. Completing Memory Plaza last also ensures you have the Phase Disruptor charges (a maximum of 3) needed to bypass the locked memory gates in the plaza's final corridor, a mechanic that is otherwise inaccessible and soft-locks progression if attempted earlier.
-
The Hollow Corridors: Start here, because the deflection puzzles in this area teach you the mechanic with low stakes. The first deflection puzzle involves deflecting a projectile into a cracked wall, which reveals a hidden room containing a Record.
-
The Mirror Lake: This area requires the deflection tool and introduces pressure plate puzzles. The lake crossing puzzle requires you to position two movable objects on pressure plates to raise a bridge. The second traversal ability is found at the end of this area, which unlocks the next region.
-
The Ashen Garden: With the second traversal ability, you can reach elevated platforms and solve timing puzzles. The collapsing platform sequence is the main challenge here, and you need to sprint between platforms as they fall. The episode boss is located at the end of this area.
The hidden regions in Episode 1 are optional but contain valuable Records and Symbols. The first hidden region requires the second traversal ability and contains a challenging multi-step chain puzzle. The second hidden region requires the sprint ability and contains a stealth section that is technically optional but rewards you with a powerful Symbol.
Episode 2 Region Order
Episode 2 introduces the Avengers and Victims enemies from the v2.2 update, and the puzzle design shifts toward stealth and avoidance. The stealth tool is acquired at the start of this episode, and you should prioritize upgrading it at the Workbench because several puzzles require the upgraded version.
The patrol route puzzles in Episode 2 require you to observe enemy patterns and time your movements. The first major stealth puzzle involves crossing a courtyard with three patrolling enemies, and the solution requires using the distraction tool to create windows. The second major stealth puzzle involves navigating a corridor with moving searchlights, and the timing windows are tighter.
The new areas added in the v2.2 update contain the most complex chain puzzles in the game. These require combining deflection, pressure plates, and stealth mechanics in a single sequence. Community reports indicate that these puzzles take 10-15 minutes on first attempt, so be patient and observe the environment carefully.
| Region | Puzzle Types | Required Abilities | Optional Content |
|---|---|---|---|
| The Hollow Corridors | Switch, deflection | Deflection tool | Hidden Record room |
| The Mirror Lake | Pressure plate, switch | Deflection tool, sprint | Second traversal ability |
| The Ashen Garden | Timing, chain | Second traversal ability | Two hidden regions |
| Episode 2 Courtyard | Stealth, avoidance | Stealth tool | Distraction upgrade |
| Episode 2 New Areas | Chain, stealth, deflection | All abilities | Powerful Symbols |
Practical Tips for Vapor World: Over The Mind How to Solve Puzzles Faster
Understanding the underlying logic of each puzzle is the real key to speed, not just memorizing the sequence. Rather than brute-forcing the solution order, learn to identify the environmental cues that trigger each sequence, such as the specific color patterns on the floating spires or the rhythm of the ambient audio cues. By internalizing these cause-and-effect relationships, you'll be able to recognize the correct sequence for a new puzzle on your first attempt, effectively cutting your solve time in half and eliminating the trial-and-error that leads to frustration.
Observe before acting is the most important rule. Every puzzle in the game has visual cues that indicate the solution, but these cues are easy to miss if you rush. Take 30 seconds to survey the area before touching anything. Look for glowing indicators, directional arrows, and environmental details that hint at the solution. The color-coded switch system is the clearest example, but the same principle applies to all puzzle types.
Use the environment as your guide. The game places movable objects near pressure plates, projectiles near deflection targets, and patrol routes near stealth corridors. If you are stuck, look for objects that seem out of place or interactable elements you have not tried. The Record system also helps, because some Records contain hints about puzzle solutions. Reading all Records in a region before attempting its puzzles will give you context that makes the solutions clearer.
Backtrack strategically rather than exhaustively. When you acquire a new ability, revisit the regions you have already explored, but focus on areas that were clearly gated. The game marks gated areas with visual indicators, such as cracked walls, glowing barriers, or elevated platforms. You do not need to re-explore entire regions; just check the gated areas and move on.
Upgrade at the Workbench regularly. The Workbench upgrades are not just stat boosts; some upgrades affect puzzle mechanics. The distraction tool upgrade in Episode 2 increases the distraction radius, which makes stealth puzzles significantly easier. The sprint upgrade increases sprint duration, which gives you more margin on timing puzzles. Prioritize upgrades that affect puzzle mechanics over pure combat stats.
Use the deflection mechanic creatively. The deflection tool is not just for combat; it can interact with environmental objects. Some puzzles require you to deflect projectiles into targets, but others require you to deflect enemy attacks to create openings. The Crack Break state can also affect puzzle elements, so experiment with deflecting in puzzle areas.
Take breaks on difficult puzzles. The multi-step chain puzzles can be mentally taxing, and frustration leads to mistakes. If you have attempted a puzzle three times without progress, step away and explore a different area. You might find a Record or Symbol that provides the hint you need, or you might simply approach the puzzle with fresh eyes.
Track your progress with the Record system. The game tracks which Records you have found, and this serves as a de facto completion tracker. If you are missing Records, you are likely missing hidden areas or puzzle solutions. The official website confirms that Records are scattered throughout the dream world, and reading them recalls forgotten skills.
Frequently Asked Questions
What is the correct sequence for the Prologue puzzles?
The Prologue puzzles follow a simple switch and gate pattern. Activate the first switch closest to the gate, then the second switch in the middle, and finally the third switch in the hidden alcove. The color-coded system matches each switch to a specific gate, and activating them in reverse order triggers a 15-second reset timer.
How do I solve the deflection puzzles in The Mirror Lake?
Deflection puzzles require you to time your parry when a Projection attacks, triggering a Crack Break. While the enemy is defenseless, extract its Embers with the power of the Id. Some puzzles require deflecting projectiles into specific targets, so position yourself between the projectile source and the target before deflecting.
What abilities do I need for the Episode 2 stealth puzzles?
The stealth tool is required, and upgrading it at the Workbench is strongly recommended because the distraction radius increases significantly. The upgraded tool lets you distract enemies from greater distances, which creates larger windows for crossing patrol routes. The sprint ability is also useful for timing your movements between enemy patrol cycles.
Are the hidden regions in Episode 1 worth exploring?
Yes, the hidden regions contain valuable Records and Symbols that enhance your abilities. The first hidden region requires the second traversal ability and contains a challenging multi-step chain puzzle that rewards you with a powerful Symbol. The second hidden region requires the sprint ability and contains a stealth section with a Record that provides important lore context.
How do the v2.2 update areas change the puzzle sequence?
The v2.2 update areas slot into the sequence after Episode 2's "Consequence of The Choice" content, not before it. These new regions demand Workbench-granted abilities like sprinting and rolling to navigate, so attempt them only after acquiring those movement tools. Expect 10-15 minute deflection and stealth chains against Avengers and Victims Projections.